Build A Professional Photo Shoot Setup: Definitive Guide [2023]
Building a professional photo shoot setup is like assembling a complex jigsaw puzzle. It requires careful planning, thoughtful selection of pieces, and creative arrangement to create a stunning picture. Each decision must be made with precision, from the type of photo shoot to the location, props, and equipment.
With the right setup, you can achieve spectacular results that will take your photography to the next level.
In this definitive guide, we’ll discuss all the elements necessary to build a professional photo shoot setup. From determining the type of photo shoot to selecting props and equipment, we’ll walk you through the entire process.
Book Your Next Project With Us
Boost your creative process at Media Pouch Studios – your all-in-one hub for creation and growth
Planning and Preparation
As the quote goes, “Planning is half the battle.” This rings especially true when it comes to building a professional photo shoot setup. To ensure your shoot goes off without a hitch, you must take the time to plan and prepare beforehand.
1. Determining the Type of Photo shoot
Before jumping into the details, you first must decide what type of photo shoot you’re going to do. Are you shooting portraits? Fashion? Product photography? Is it a brand photo shoot or a headshot? Each type requires its own distinct set of considerations. Therefore, it’s essential to start by deciding the type of photo shoot you’ll be doing.
2. Choosing a Location
Once you’ve established the type of photo shoot, you need to decide on a location. Ask yourself: What kind of background do I want? How much space do I need to work with? What kind of light is available? Will the weather be an issue? Will you need to tap into the perks of having a photo shoot at a luxury venue? Answering these questions will help you choose the right spot for your shoot.
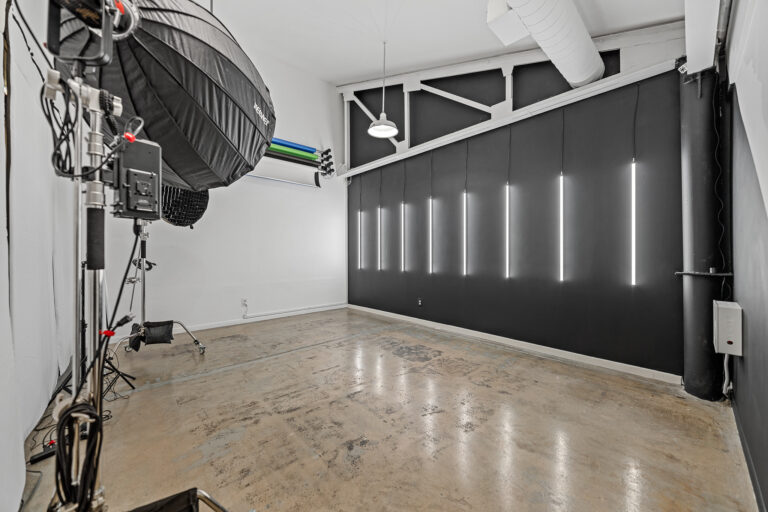
4. Indoor vs. Outdoor, Natural vs. Artificial Light, Background Considerations
The next step is to determine the lighting conditions you’ll be working with. Will you be shooting indoors or outdoors? If outdoors, will you be using natural light or artificial lighting? What kind of background do you want to use? Thinking about these elements ahead of time can help ensure your photo shoot is successful.
Plus, each option comes with its own set of advantages and disadvantages that you should consider when making your decision. For example, natural light provides a softer, more natural look, but its availability is limited. On the other hand, artificial lighting gives you greater control over your environment but can be expensive to set up and maintain.
5. Selecting Props and Equipment
From tripods to reflectors, props and equipment are an essential part of any photo shoot. Knowing the type of photo shoot you’re doing and what kind of lighting you’ll be working with can help you determine which tools and accessories you need.
Finding the right props and equipment can be a challenge. Budget-friendly options are available, but they may not have the same quality or features as more expensive options. It’s important to do your research and read reviews before making a purchase.
6. Preparing the Models or Subjects
Your models are the stars of the show and deserve special attention. Work with them to choose clothing, makeup, and hairstyles that are appropriate for the type of photo shoot you’re doing. Give them direction on how to pose, explain what kind of look you’re going for, and most importantly–build a rapport with them.
Your models should feel comfortable and confident on set. The more you can do to put them at ease, the better your photo shoot will be.
7. Clothing or Makeup
Speaking of clothing and makeup, it’s important to discuss these beforehand. Again, this will depend on the type of photo shoot you’re doing. Natural colors and textures tend to look the best in photographs, so think about what kind of looks will fit with your vision for the shoot. Unless you’re doing a dramatic shoot, subtlety is key.
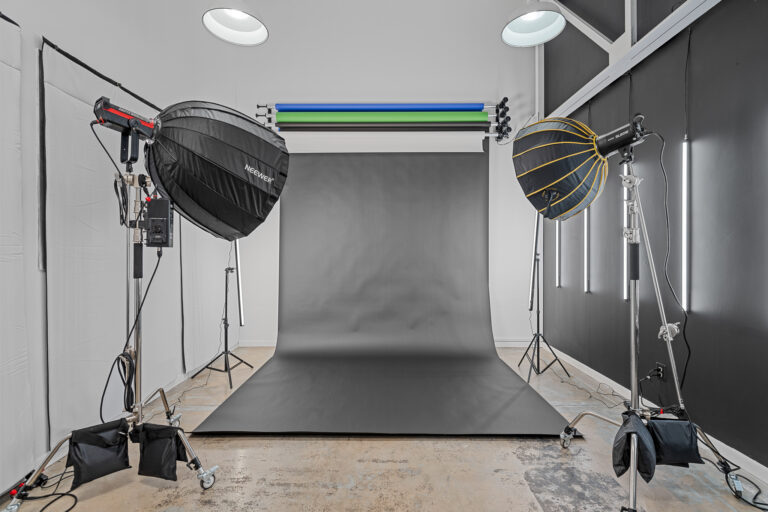
Lighting

Your lighting system can bring your vision to life. Plus, it can add depth and dimension to your photos. When setting up the lights, consider the type of light, where it is placed concerning your subject, and whether you need to diffuse the light or add fill.
Here are a few tips and techniques to help you set up your lighting:
1. Setting Up Lighting Equipment
Setting up the right lighting can be tricky. You’ll need to consider the type of light, its placement, and whether it needs to be diffused. If you’re using strobes, you’ll also need to set up a receiver and transmitter. Finally, it’s important to ensure the lights are secure and will not move during the shoot.
2. Types of Lights, Positioning, Diffusing Light
Different types of lights can be used for different effects. For example, you may opt for softboxes or umbrellas to create softer, diffused light. You can also use snoots and gels to create more dramatic lighting effects.
In addition, you need to consider the placement of the lights in relation to your subject. Experiment with different angles and heights to get the desired effect.
3. Using Natural Light Effectively
If you’re working outdoors, you may opt to use natural light instead of artificial lighting. Natural light can be used to create eye-catching photographs and is often more cost-effective than using artificial lighting.
To ensure your photos look their best, take the time to consider the position of the sun, the time of day, and the weather conditions. If necessary, you can use reflectors to fill in shadows or bounce light back onto your subject.
Camera Settings
Once you have your lighting set up, it’s time to adjust your camera settings.
1. Aperture, Shutter Speed, ISO, White Balance
Technical elements such as aperture, shutter speed, ISO, and white balance need to be adjusted for optimal results. Each of these settings will affect the exposure and overall look of your images.
For instance, your aperture controls the amount of light that enters your camera, while shutter speed determines how long your camera’s shutter remains open. ISO affects the sensitivity of your camera to light, and white balance helps you achieve accurate color in your photos.
Regulating these settings is key to achieving breathtaking photos. Experiment with different combinations until you get the desired effect.
2. Low Light, Bright Light, and Backlit Scenes
If you’re shooting in low light, adjust your settings to allow more light into the camera. Consider using a tripod and increasing your ISO, shutter speed, and aperture as necessary.
When shooting in bright light, you may need to decrease your ISO and use a faster shutter speed. To prevent overexposure, consider diffusing your light source or using a reflector to fill in any shadows.
Finally, backlit scenes can be tricky to shoot. Shoot with the sun behind the subject and use a flash or reflector to fill in the front of the scene. You may also need to adjust your white balance settings to get an accurate representation of the color.
No matter what type of light you’re working with, it’s important to adjust your camera settings accordingly and be mindful of how they affect the overall look of your photos. By taking the time to work out these technical elements in advance, you’ll be able to get great results from your photo shoot.
Posing and Composition
Posing and composition are critical elements of a successful photo shoot. To ensure your photos look their best, take the time to consider how you’ll arrange the subjects in your scene.
Techniques for Creating Dynamic and Engaging Compositions
Leverage these techniques to achieve dynamic compositions:
1. Rule of Thirds
The rule of thirds is one of the most popular compositional techniques used by photographers. By dividing your frame into thirds and positioning your subject along one of the lines or intersections, you can create an aesthetically pleasing arrangement.
2. Leading Lines
Leading lines are an effective way to draw attention to your subject and lead the viewer’s eye around the frame. Look for natural lines in your scene and use them to draw attention to your subject and create a dynamic composition.
3. Symmetry
Symmetrical images are aesthetically pleasing and often evoke feelings of balance and harmony. Look for opportunities to use symmetry in your photos and position your subjects accordingly.
4. Negative Space
Negative space can be used to emphasize the main subject in your photo or to create a sense of minimalism. When shooting with negative space, be mindful of how it affects the composition of your photo and use it to highlight your subject or create a sense of balance.
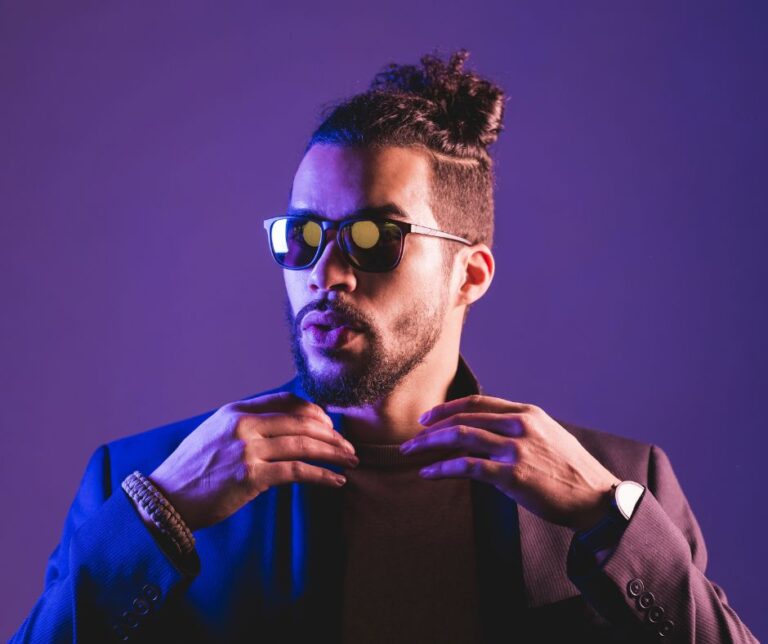
Posing Models or Subjects for the Best Results
Your models’ facial expressions and body language translate the message and emotion of your photos. Be sure to give direction and encourage natural poses that reflect the mood and atmosphere of your photo shoot.
For example, if you’re shooting a romantic couple, focus on poses and facial expressions that evoke feelings of love and intimacy. Or, if you’re shooting a relaxed family portrait, focus on smiling and laughing poses that capture the joyful spirit of your subjects.
When posing your models or subjects, keep in mind that subtle adjustments can make a significant difference. Be sure to position your models in complementary poses and direct their body language and facial expressions accordingly.
Book Your Next Project With Us
Boost your creative process at Media Pouch Studios – your all-in-one hub for creation and growth
Post-Production
A lot of magic happens in post-production. After the photo shoot, you’ll need to edit and retouch your photos using your post-production suite to make them look their best before final delivery.
Editing and Retouching Photos After the Photo Shoot
Once you’ve selected the best images from your shoot, it’s time to start editing. You can use a variety of tools such as Adobe Photoshop or Lightroom for color correction, and cropping of your photos.
Color Correction
You may also need to adjust the white balance settings of your photos, or apply a color grading filter to add a unique look and feel.
Cropping
Cropping can be used to change the composition of your photos or draw attention to specific elements in the scene.
Selecting the Best Images for Final Delivery
When selecting the images for final delivery, you should look at each photo objectively and consider criteria such as composition, exposure, focus, and overall quality.
Organizing and Saving Images
Finally, take the time to organize your photos into folders based on date or subject. This will help you find specific images quickly, and ensure that your photos are backed up safely.
Take Your Professional Photo Shoot Setups to the Next Level
Shooting a professional photo shoot takes skill and practice, but with some careful planning, you can create stunning images. Follow these steps to prepare for the shoot, compose engaging images, and select the best photos for delivery. With this guide in hand, you’ll be able to take your photo shoots to the next level.
If you’re looking for additional tips, tricks, and resources to help you create amazing photos, check out our blog for more photography-related articles.
Also, if you want to save yourself trouble by partnering with the best photo studio in Austin, Texas, contact us today. At Media Pouch Studios, we are always happy to recreate your dream, help you create amazing photos, and make your photo shoot a success.